Friday, September 30, 2011

Halloween Glass Block

Today was my first day designing for She's a Sassy Lady, I'm very excited.


I thought that I would make something Halloween so we can all get our decorating started.
The block started of clear (from ACMoore) so I used Rust-Oleum Frosted Glass spray to give the glass block the frosted look.

To decorate the block I used Avery clear sticker paper (from Walmart) in my Imagine to color and cut my images.
For the Happy Halloween I used Celebrate with Flourish for the cuts and All Wrapped Up for the color cut at 2 inches.
 The tree is also from Celebrate with Flourish, colored with All Wrapped Up cut at 4 inches.
The last cut is from Holiday Cakes also colored with All Wrapped Up cut at 1.2.
It was so easy to put the cuts on the block I did not need to use transfer paper.
Once I good all the pieces on the block I put a sting on battery operated lights in the block (see picture above,got them from ACMoore).
I hope you like it and please follow me. 
I also want to give a big thank you to Bobby ,the Sassy dude and Sheila , the Sassy Lady for all their help and advice.
Thanks and I will see you next time.

Monday, September 26, 2011

Just a Reminder

The 2 Close to my Heart stamp specials end on Friday. The first special is the Stamp of the Month for $5 with a $50 purchase and the MY ACRYLIX DOUBLE STAMP SET for Free with a $75 purchase. Let me know if you need anything. Thanks

Thanks Everyone

I just wanted to thank everyone for coming to visit my site for my Art Philosophy Philosophy week. I had fun doing it.

Saturday, September 24, 2011

Close to my Heart Monthly Club

I am starting a online monthly club. I need 5 to 6 people to participate, you will need to spend $25/$30 plus shipping per month for 5 to 6 months. During each month 1 person will be selected to be the hostess and receive $25 in free products. Please contact me if you have any questions on are interested in joining. Thanks.

Art Philosophy Project Day 6

First of all I want to say thank you for everyone stopping by to see my projects, if you like my work please follow me.
Now, today's project is the gift box on page 22 and the tag on page 70.


The box is cut at fit to page which came out to be 10.5 inches.
The tag is cut at 3 inches.
The stamp is from the CTMH my acrylix pair a phrase stamp set that is free with a $75 til September 30 purchase, they are super cute. If you would like to place an order, click on the shop with me link at the top right.
I love this box, it was so easy to put together and it needed no adhesive.

Art Philosophy Project Day 5

Hey Guys, today I made the Chinese Take Out Box on page 24 with the scalloped circle on page 41 and the rose flower on page 69. The stamp is from one of the stamp sets in the Cricut bundle.
The box is cut out fit to page with is 10.5 inches.
I cut the rose at 3 and 5 inches because I didn't know which one would fit. I wound up using the 5 inch and the scallop circle is cut at 2 inches.
Here are both cuts put together. I used jewelry wire for the handle.
Here's the finished project. sorry about the stamp picture, my stamp was acting up.

Thanks for visiting and make sure to check back Saturday night for another project.

Thursday, September 22, 2011

Art Philosophy Project Day 4

Hi, everybody today's project is a snack holder for your water bottle. I used the door knob hanger on page 25 and the tag on page 45 cut at 1.25 inches. I used the Martha Stewart 10 piece Custom Stamp Kit.
Here is the box cut out at 9 inches. I made a fold line right under slit opening.

Here it is on the water bottle.
And here it is with the snack in it.

Hope you like it. I thought it was a fun idea.

Wednesday, September 21, 2011

Art Philosophy Project Day 3

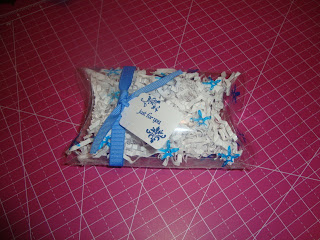
Today's project is the pillow box on page 28. I also cut the tag from the cartridge at 2 inches and the stamp on the pillow box is from the stamp from the stamp set in the bundle.
I cut the box out of acetate at 8 inches.
Then I stamped it with Azure StazOn with the star stamp. After your stamping has dried now it is time to fold. It will be hard but keep trying On some parts it's easier to bend the outer edges to get them to stay.
Here it is put together. For the glue, it was really trial and error. First I used invisible vellum tape, that did not work. Next I tried Beacons Zip dry, nope did not work. Finally feeling defeated I tried hot glue and it worked!!

My Entry for the HSN Banner Contest

After looking at some of the entries for the contest on the Cricut Circle Message board, I don't think I have a chance but here it is.
I used Car Decals for the cricut heads. Birthday Bash for the banner and the font is American Alphabet for the font. if you look close on the polka dot paper is the name of a cricut machine or items. They are Cake, Gypsy, E2, Imagine, Personal, Cartridges, Expression, and Create.

Thanks for looking.

Tuesday, September 20, 2011

Art Philosophy Project Day 2

Hi, everyone. Today's project is the French Fry box on page 27.
The french box is cut at 8 inches, the tag on the front is cut at 2 inches and the stamp is from the CTMH cricut bundle you can order Here.

Thanks for looking and check back tomorrow.

Monday, September 19, 2011

Art Philosophy Project Day 1

This week I will going a project everyday from something on the Art Philosophy Cartridge, please come back everyday to take a look.

Today I am going to be making the box on page 21 and the card on page 23.
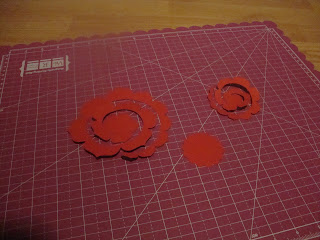
Here is what the cut out looks like.
The box is cut out at fit to page which is 10.5 inches.
The card is cut at 4.5 and 4.25 layer.
The frame is cut at 1.75 and the letter is 1.25 inches and the flower is 3 inches.
The paper is from sei paper pack called chocolat.


If you are interested in the cartridge, you can order it Here.

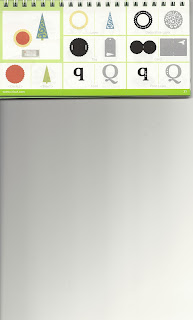
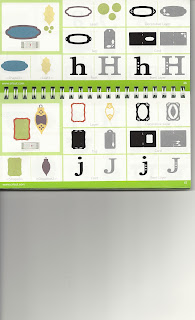
There are screen shots of the handbook further down my blog.

Thanks for looking, please follow me and hope you like it.

Sunday, September 18, 2011

Car Vinyl

I have not used vinyl a lot so I thought I would try it out and made this. So I thought I would share.
UPDATE: My husband said that he thinks that it is too small. So back to the drawing board to make it bigger.

Butterfly Wall Hangings

Hi,everyone. I made these to hang on my wall over my bed.I got the idea from frames I saw at Kohl's that I wanted but they did not have all the words that I wanted, so I made my own.
I started with 5x5 white frames I bought from AC Moore.
 I then painted them with the new Martha Stewart craft paint and paint brushes. I LOVE this stuff!!!
For the decorations, I used butterflies from Wall Decor and More, Cake Basics, Sophie, Art Philosophy, Straight From The Nest and Give A Hoot all cut at 2.5.  The words are all from Wall Decor and More cut at 1 inch.

Hope you like, I had a blast making them.

Friday, September 16, 2011

Art Philosophy Handbook

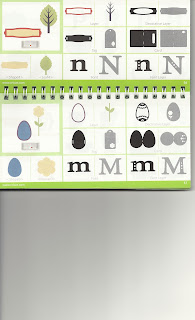
Here is the handbook for Art Philosophy, sorry it' so long.
If you would like to order it you can buy it Here.
Thanks for looking.